Here is a short virtual tour that explains how to create your own booking engine

Introduction & Background
This is a guide explaining how to create a booking engine in MeetingPackage.
All you need to do is to create the Booking Engine and implement the link to your website. We recommend implementing the link in the website's main navigation in order to get the maximum benefit out of the service.
Booking Engine - where to find it?
By selecting the Booking Engine option in the sidebar, the user is taken to the page
where the booking engine is defined.

Create Booking Engine
Once you have created your venue, you can create the booking engine with your website’s own look and feel.

Start by selecting ‘Single’ and select your venue.
Your website: your website's URL, which will be used to create a link from the booking engine.
Site name: name of the venue that will be visible in emails and used in the creation of the booking engine.
Booking Engine page setting

You need to define the header and footer color for your booking engine, as well as the font color, for the link to go back to your website. Click on the color fields and select the colors you want to use according to your website's look and feel.
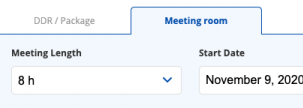
This is where you also define the Default Product “Search” ie. which tab to be opened by default once the booker enters the venue profile: DDR/Package or Meeting room.
Snippet settings

The colors for the search box snippet are configurable under Snippet settings.
You can select the color for the font, buttons, and background.
Set also the Default delegates - this is the default value for delegates once the booker is entering the booking engine. The default delegate value works in line with the MeetingRooms min and max room capacity already set up in the venue creation.
Snippet preview
Here you will see in real-time how your snippet will be displayed as you make changes to the color configuration.

Once you are ready with the settings, select ‘Create booking engine’.
Widget and iframe
Once you have created the booking engine, you will see the code for widgets on top of the screen. Codes for both Widget and Iframe work the same way.

Copy the code and insert it into your webpage.
Multi-property booking engine
You need to create a multi-property engine if you have multiple venues and want one booking engine for all of them.
First, create a single Booking Engine for each of the individual venues. Once created, they can be combined into one multi-property Booking Engine.

Implementing the Booking Engine
Once you have created the Booking Engine, or optionally the booking engine has already been created for you, the best practice for implementation is to insert the booking engine URL (example screenshot below) into your website's main navigation.

Implementing the URL above the fold (the view when someone opens your web page) either in your website's main menu/navigation or as a CTA significantly impacts conversion. Also, you can add the widget to your website for your customers to search for their requested Meetings & Events services before they land on your booking engine profile.